
58 posts tagged with "azure"

View All Tags

· 4 min read

One of the highlight among the announcements made at Microsoft Build 2020 was announcement of the new Azure service in the keynote: Azure App Static Web Apps. Azure Static Web Apps is a service that automatically builds and deploys full stack web apps to Azure from a GitHub repository. This service allow web developers to publish websites to a production environment by building apps from a GitHub repository for free. developers can use modular and extensible patterns to deploy apps in minutes while taking advantage of the built-in scaling and cost-savings offered by serverless technologies.

It provides the killer features for developers such as:

  • Free web hosting for static content like HTML, CSS, JavaScript, and images.
  • Integrated API support provided by Azure Functions as backend APIS
  • First-party GitHub integration where repository changes trigger builds and deployments with Github Actions
  • Globally distributed static content, putting content closer to your users.
  • Free SSL certificates, which are automatically renewed.
  • Custom domains* to provide branded customizations to your app.
  • Seamless security model with a reverse-proxy when calling APIs, which requires no CORS configuration.
  • Authentication provider integrations with Azure Active Directory, Facebook, Google, GitHub, and Twitter.
  • Customizable authorization role definition and assignments.
  • Back-end routing rules enabling full control over the content and routes you serve.
  • Generated staging versions powered by pull requests enabling preview versions of your site before publishing.

How i deployed Meme-Generator App:

I was building this meme generator app for an angular session today with Azure cognitive service to detect persons in the image and also to generate a meme by adding a text as the user wanted. As soon as Azure static web apps was announced I wanted to check it out with this application on how easy it is to deploy. Experience was seamless and easy to deploy and generate a url in few seconds.

Let me explain, how i achieved this in quick time.

Step 1. Sign-in to the Azure Portal, Search for “Static Web Apps”, and click the Create button

Visit https://portal.azure.com, sign-in, and use the search box at the top to locate the Static Web Apps service (note that it’s currently in “preview”). click the Create button to get started.

Create Static Web App

In this step you’ll fill out the Static Web Apps form and sign-in to your Github account to select your repository.

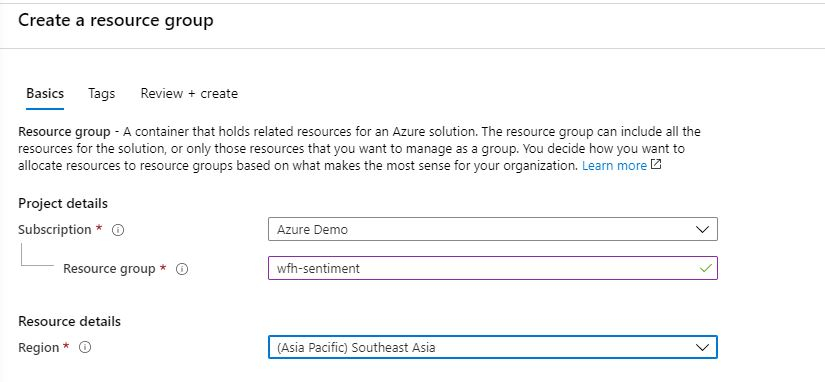
  • Select your Azure subscription.
  • Create a Resource Group
  • Name your app , in my case its meme4fun
  • Select a region (as of now its not available in all regions)
  • Sign-in to Github and select your org, repo, and branch. 

Once you’re done filling out the form click the Next: Build > button.

Step 2: Define Angular App location, API, and Build Output

The next step is to define the path where my app is located in the repository, and i did not have any azure function integrated and i will keep it as empty, and the directory where my build artifacts (your bundles) are located(i.e dist/meme-4-fun). After entering that information click the Review + create button.

Defining Paths

Step 3:  Click the Create and Look for the Magic !

Once you are good with everything you can go ahead and click the create button and you will see the application successfully gets deployed and end point generated to access it public.

Deployment complete

Once the deployment is done, if you go the resource and click on overview you will see a configuration as follows,

Overview

It has the urls of the Github Actions and as well as Github source code and also the url of the application deployed. If you’d like to see the build in action on Github, click the Workflow file above.

You can access the meme generator application and create your own memes from https://lively-forest-0fd67f010.azurestaticapps.net/

Here are some great links you can visit to learn more. 

The above app is also available in the Microsoft's sample static web app Gallery.

If you're a web dev you need to check out this cool service for sure. Cheers!

· 5 min read

Overview : 

Azure Service Bus is being used as one of the most reliable enterprise messaging services across different domains like health care, finance etc. Often, users do have uncertainties in handling the dead-letter messages. Before diving into the best practices, I would like to give you a quick introduction on dead-lettered messages.

Azure Service Bus Dead-letter Queue

Azure Service Bus queues and topic subscriptions provide a secondary sub-queue, called a dead-letter queue. The purpose of the dead-letter queue is to hold messages that cannot be delivered to any receiver, or messages that could not be processed. So, any message that resides in the dead-letter queue is called a dead-lettered message.

Best practices in handling Azure Service Bus dead-letter message

Most of the time we could notice that the message fails due to the following reasons;

  1. Dependent service not available
  2. Faulty message
  3. Process code issue

Dependent service not available

This could be one of the foremost and time after time reasons where the services that reply on message delivery may go down for a short period. For instance, the Redis or SQL connection issues may often happen.

Faulty Message

According to the business scenarios, you may configure the custom properties to you Azure Service Bus messages and validate with respect to the values that should contain in the custom/user defined properties.

If in case the message doesn’t have a mandatory parameter or some value is incorrect, then the message will end up in the dead-letter queue after the maxDeliveryCount is attained.

The failed delivery can also be caused by a few other reasons such as network failures, a deleted queue, a full queue, authentication failure, or a failure to deliver on time.

Here we can drill down the reasons into two ways:

  1. System level dead-lettering
  2. Application level dead-lettering

Reasons for System level dead-lettering

  • Header Size Exceeded
  • Error on processing subscription rule
  • Exceeding time to live value
  • Exceeding maxDeliveryCount
  • When Session id property is set to true (the default is false)

Reasons for Application level dead-lettering

  • Messages that cannot be properly processed due to any sort of system issue
  • Messages that hold malformed payloads
  • Messages that fail authentication when some message-level security scheme is used

In this second scenario, the best practice is to manually verify the dead-lettered messages (using Service Bus Explorer or Serverless360) to correct message data or sometimes to purge messages and clear the queue.

Message process code issue

This is a very rare case given a good number of resources in the community to fetch the flawless code. The developer should keep all the scenarios in the head and handle all the exceptions.

In the first and third scenario, the best practice is to use a flawless code that should run and reprocess the dead-lettered messages, you can find the sample code below;

internal class Program
{
private static string connectionString = ConfigurationSettings.AppSettings["GroupAssetConnection"];
private static string topicName = ConfigurationSettings.AppSettings["GroupAssetTopic"];
private static string subscriptionName = ConfigurationSettings.AppSettings["GroupAssetSubscription"];
private static string databaseEndPoint = ConfigurationSettings.AppSettings["DatabaseEndPoint"];
private static string databaseKey = ConfigurationSettings.AppSettings["DatabaseKey"];
private static string deadLetterQueuePath = "/$DeadLetterQueue";

private static void Main(string[] args)
{

try
{
ReadDLQMessages(groupAssetSyncService, log);
}
catch (Exception ex)
{
Console.WriteLine(ex.Message);
throw;
}
finally
{
documentClient.Dispose();
}
Console.WriteLine("All message read successfully from Deadletter queue");
Console.ReadLine();
}

public static void ReadDLQMessages(IGroupAssetSyncService groupSyncService, ILog log)
{
int counter = 1;
SubscriptionClient subscriptionClient = SubscriptionClient.CreateFromConnectionString(connectionString, topicName, subscriptionName + deadLetterQueuePath);
while (true)
{
BrokeredMessage bmessgage = subscriptionClient.Receive(TimeSpan.FromMilliseconds(500));
if (bmessgage != null)
{
string message = new StreamReader(bmessgage.GetBody<Stream>(), Encoding.UTF8).ReadToEnd();
syncService.UpdateDataAsync(message).GetAwaiter().GetResult();
Console.WriteLine($"{counter} message Received");
counter++;
bmessgage.Complete();
}
else
{
break;
}
}

subscriptionClient.Close();
}
}

Myths to chunk out

Does the SequenceNumber of message added by Azure Service bus keeps on increasing on each failed attempt till it reaches maxDeliveryCount?

The sequence number can be trusted as a unique identifier since it is assigned by a central and neutral authority and not by clients. It also represents the true order of arrival and is more precise than a time stamp as an order criterion, because time stamps may not have a high enough resolution at extreme message rates and may be subject to (however minimal) clock skew in situations where the broker ownership transitions between nodes.

Setting maxDeliveryCount = 1, is that best practice to deal with poison messages so that consumer never attempt twice to process message once it failed?

It is not a best practice to set the maxDeliveryCount=1. Because if some network/connection issue occurs, the built-in retry will process and clear from the queue.

If you are reading messages in batch, a complete batch will re-process if an error occurred any of message.

Conclusion

In this blog, we have seen a sneak peek of Azure dead-lettered queues and various reasons for dead-lettering of messages. Further, we discussed the best practices on handling the dead-lettered messages. Finally, we looked into the myths to chunk out while dealing with Azure Service Bus dead-lettered messages.

I hope you enjoyed reading this article. Happy Learning!

This article was contributed to my site by Nadeem Ahamed and you can read more of his articles from here.

· 7 min read

Quarantine, self isolation , social distancing for the past one month, I’m living with these words. While most of us are investing this time to learn new technologies/tools. I challenged myself to skill up myself and have deep knowledge on certain services on Azure.

Kubernetes provides a uniform way of managing containers. Its aim is to remove the complexity of deciding where applications should be scheduled to run, how to locate them, how to ensure they are running, autoscale or deploy. Azure Kubernetes is a service on Azure that help Customer achieve their business goals, by providing a layer of automation on top of their infrastructure. Going towards the technical features, Azure Kubernetes has a lot to offer, but at the end of the day, is a great platform for saving money or growing faster.

Azure Kubernetes service offers great set for microservice architectures. If your application needs to start hundreds of containers quickly or will terminate them just as quickly and to have full control of those services, AKS is a great option. There are other scenarios such as Bigdata, IOT scenarios you would consider AKS as a preferred choice. In this post i will explain how to easily setup your application running on AKS cluster in 10 minutes with CI/CD pipelines.

PreRequisities:

You will need to have an Azure Subscription. If you do not have an Azure subscription you can simply create one with free trial.

How to build & Deploy the application:

If you are a beginner with Azure Kubernetes Service, Azure Devops is the best place that you need to look in order to understand how an Application is deployed on Azure Kubernetes. The Azure DevOps Project simplifies the setup of an entire continuous integration (CI) and continuous delivery (CD) pipeline to Azure with Azure DevOps. Cool thing is that, you can start with existing code or use one of the provided sample applications. It enables you to quickly deploy that application to various Azure services such as Virtual Machines, App Service, Azure Kubernetes Services (AKS), Azure SQL Database, and Azure Service Fabric.

Lets Deploy an Node.js App to Azure Kubernetes Service :

Navigate to Azure Portal and search for Azure Devops Project in the market place/search bar.

Azure Devops Project

Let's go ahead and add a new project.

Add new Azure Devops Project

Azure Devops project enables developers to launch an app withany Azure App Service in just a few quick steps, providing everything needed to develop, deploy and monitor an app. Create a DevOps Project, and it provisions all the Azure resources and provides a Git code repository, Application Insights integration and a continuous delivery pipeline setup for deployment to Azure. The DevOps Project dashboard lets you monitor code commits, builds and deployments from a single view in the Azure portal. How cool is that ?

With the help of Azure DevOps Projects, you can build an Azure application, on an Azure service, in quick time. You also get automatic full CI/CD pipeline integration, built-in monitoring and deployment to the platform of your choice. Azure Devops Project supports almost all the latest languages out there in practice such as .Net,Java,Node.js,PHP,Python and Go.

Next step is to select the Language you want to have the application on, I will go ahead and choose Nodejs as my application language. But you could choose any language that you want to test.

Create Node.js Devops Project

Once you select the language, next step is to select the framework in which you want the application to be based on , For example, if you choose Python it could be based on Flask,Django etc. Similarly you have the flexibility to choose the framework once you decide the language. In this case i will go ahead and choose express.

Select the Framework

Next step is the critical part of the process, This is the step that defines which service you would be using to deploy the app. You can Run your application on Windows or Linux. Simply deploy to Azure Web App, Virtual Machine, Service Fabric or choose Azure Kubernetes Service for your application. Each of those option provides deployment in an elegant and fast way. In this case, we will deploy the application to Azure Kubernetes service.

Azure Kubernetes Service to Deploy

Once you are done with the above step, final step is passing the configuration details for the Kubernetes cluster on AKS as follows,

Most of the settings are self explanatory , you can change the size of underlying VMs based on your requirement. The default number of nodes for your cluster comes as 3 , if you need to make changes to your cluster and the container registry settings click on Additional Settings. Here you can configure the Kubernetes version, Node count, App Insights and resource group location. The HTTP application routing solution makes it easy to access applications that are deployed to your Azure Kubernetes Service (AKS) cluster. In this case we will disable it.

Additional Settings AKS configuration

Container registry is needed as your images needs to be pushed to them. Once you're good with all settings, click ok and done!. You will see a notification box as below.

K8s cluster, Container Registtry, CI/CD pipelines are created

Once everything is created you will be redirected to a Dashboard page as below.

Resources in page

The four stages involved are:

  1. Azure Kubernetes Cluser: Created and configured your Azure Kubernetes Cluster and application endpoint.
  2. Azure Container Registry : Created and application image is pushed to the container registry.
  3. Repository: Created a distributed Git repository and checked in sample code.
  4. CI/CD Pipeline: Seamlessly connected with the Azure Devops collaboration solution allows you to plan, test, release and monitor your solutions.
  5. Application Insights:  Created and configured your Application Insights telemetry which enables active monitoring and learning to proactively detect issues and continuously analyze and test hypotheses without code.

You can see all the resources created on Azure under the resource group

Resource Group with All resources

When you click on the Kuberentes cluster, you can see the Kubernetes related resources such as dashboard logs etc.

Kubernetes cluster resources

And if you navigate to the blade you can see the settings such as Enabling Dev spaces , Kubernetes version, Application Insights etc.

On the Azure Devops side, you will be able to see new Azure Devops project created with Dashboard, Backlog items, CI/CD pipelines etc.

Azure Devops Project with CI/CD pipelines

And when you click on the application endpoint, you would see that the application running successfully on Azure Kubernetes service.

Nodejs App on AKS

In order to verify the services and pods, you could follow the steps provided in the Azure Kubernetes dashboard configuration and when you open up the dashboard, you can see the status of each services.

Azure Kubernetes dashboard

I have spent more than 4 days in the past to configure Kubernetes to deploy my application. But Azure Devops project Simplify and speed up the DevOps process with Azure DevOps services. If you want to explore more kind of scenarios on different services on Azure its worth to explore Azure Devops Labs. I hope it makes it easier to get started with any of the deployment with Azure services. Cheers!

· 7 min read

Overview:

Due to the recent COVID outbreak and as it continues to spread throughout the world, employees are being to asked to work from home. While most of the companies are already getting adapted to this new way of working, there are mixed opinions among employees from different parts of the world. IMO , Working from home is a good option for new parents, people with disabilities and others who aren’t well served by a traditional office setup. As this was appreciated by most of my colleagues and industry friends, i wanted to see how everyone is reacting to this new way of working across the world. In this post, i will explain how i built an application in 10 minutes to solve this particular question in mind using server less computing offered by Azure.

PreRequisities:

You will need to have an Azure Subscription. If you do not have an Azure subscription you can simply create one with free trial.

Services used:

  • Azure Logic Apps
  • Azure Functions
  • Azure CosmosDB
  • Cognitive Service
  • PowerBI

Architecture:

Architecture

Architecture of the solution is very simple and it uses most of the Azure managed services that handle the infrastructure for you.Whenever a new tweet is posted Logic Apps receives and processes the tweet. Sentiment score of the tweet can be analyzed using the Cognitive service then Azure function is used here to detect the sentiment of the tweet and finally inserted as a row in the powerBI to visualize in the dashboard. You can also use SQL server/Cosmosdb to store the tweet data if you want to process it later.

How to build the application:

Step 1: Create the Resource Group

As the first step, we need to create the resource group that contains all the resources needed. Navigate to Azure Portal and create the resource group named "wfh-sentiment"

Step 2 : Create the Function App

As the next step lets create the Function App which we need to detect the sentiment of the tweet. You can create and deploy the function app using Visual Studio Code. Open Visual Studio Code(Make sure you have already installed the VSCode with the function core tools and extension). Select Ctrl + Shif + P to create a new Function Project and select the language as C# ( But you could consider using any of the language that you are familiar with)

Create new Function App

Select language as C#

Select the trigger as HttpTrigger

Give the name of the Function

Provide the name of the function

and the logic of the Function app is as follows,

using System;
using System.IO;
using System.Threading.Tasks;
using Microsoft.AspNetCore.Mvc;
using Microsoft.Azure.WebJobs;
using Microsoft.Azure.WebJobs.Extensions.Http;
using Microsoft.AspNetCore.Http;
using Microsoft.Extensions.Logging;
using System.Net.Http;
namespace WorkFromHome
{
public static class DecideSentinment
{
[FunctionName("DecideSentinment")]
public static async Task<HttpResponseMessage> Run(
[HttpTrigger(AuthorizationLevel.Anonymous, "get", "post", Route = null)] HttpRequestMessage req,
ILogger log)
{
log.LogInformation("C# HTTP trigger function processed a request.");
string Sentiment = "POSITIVE";
//Getting the score from the Cognitive Service and determining the sentiment
double score = await req.Content.ReadAsAsync<double>();
if(score < 0.3){
Sentiment = "NEGATIVE";
}
else if(score < 0.6){
Sentiment = "NEUTRAL";
}
return req.CreateResponse(System.Net.HttpStatusCode.OK,Sentiment);
}
}
}

And the source code can be found here. Then , you can deploy the function App to Azure with simple command using Ctrl+Shift+P and deploy to Function App.

Step 3: Create the Azure Cognitive Service to determine the sentiment of the tweet text

As we discussed above, lets create the cognitive service to determine the sentiment score of the tweet. Go to the same resource group and search for cognitive service and create a new service as follows,

Create Cognitive Service

Step 4: Create Cosmosdb to store the data

In my application, i have made this step optional as i don't need to save the tweet data for historical analysis. But you can definitely use cosmosdb to store the tweets to process later. As how you created the Cognitive service create a new cosmosdb account and a database to store the data as follows,

Cosmosdb to store tweets data

Step 5: Create PowerBI dataset to visualize the data

Navigate to PowerBI portal and create a new dataset to visualize the data we collected as follows,

Create new Streaming Data set in the work space

Select API in the new streaming data set option

Configure the fields as above.

Step 6: Create the Logic App and configure the Flow

This is the core part of the application as we are going to link together the above component as one flow. You can connect these flows using designer as well as using YAML code. I will be using Designer to create the flow.

As denoted above the first step we need to add the twitter connector which you can pick from the available list of connector named "when a new tweet is posted"

Connector when new tweet is posted

You need to configure the search text which you want to get the tweets , in this case i am going to use the Hashtag "#WFH" and set the interval as 30 seconds.

Look for new tweets on every 30 seconds

The second step is to pass the tweet to Azure cognitive service to analyse the sentiment of the tweet and get the score as output

Select detect sentiment as the next step

You need to provide the key and the URL which could be obtained from the cognitive service you created above.

Configure the detect sentiment of the tweet with the input as the tweet text

The third step is to pass the score obtained above to Azure function which we already deployed to determine the sentiment of the tweet, select the azure function from the connector list as follows,

Select Azure Function which will display the functions already deployed to azure

Configure score from the Cognitive service as an input to the Azure function

Next step is to stream the data set to powerBI so that it will be readily available for the visualization. Select the below connector as next step

Configure Add rows to a dataset to insert data to PowerBI

We are almost done with the configuration, as the last step you need to map the data fields from the above steps to insert into the dataset and the final configuration looks as below.

Mapping the dataset with the outputs from the previous steps

Step 7: Visualize it in PowerBI

Now we have configured all the steps required in the logic app, navigate to PowerBI and select the data set from which you want to create the report/dashboard. In this case we will select the data set which we have already created as follows,

Select the dataset

Rest is yours, you can create lot of usual charts/visualizations according to the way you need. I have created four basic metrics to see how world reacts to "work from home"

  • Indicate the total number of unique tweets
  • Distribution of sentiments using a pie chart
  • Table which displays all the data (user,location,sentiment,score and the tweet)
  • Worldmap which shows how distribution of sentiments look like

and this is how my application/dashboard look like.

Final Dashboard with RealTime Tweets

As you can see the tweets and the sentiments are being inserted to the data set and most of the sentiments are being Positive(Looks green !!!). You can replicate the same architecture for your scenarios ( Brands/ Public opinion etc).

As you see some complex scenarios/problems can be easily sorted out with the help of serverless computing and that is the power of Azure. Cheers!

For those who are interested you can view the Live dashboard.

· 3 min read

In general, any certification offers practical experience to individuals from all the aspects to be a proficient worker.Certified professionals have more beneficial and relevant networks that help them in setting career goals for themselves.Since last year I concentrated on the different Azure certifications. This year I have have a target to complete certifications on different areas too. As a start for this year, i did the certification PL-900 today and i would say it is one of the easiest exam if you have prior experience in building Mobile applications and have a general idea on how to solve business problems.

Microsoft's Power Platform

Microsoft's Power Platform is a low code platform (an environment with graphical user interfaces rather than traditional scripts and programming languages) powered by Microsoft Azure (the cloud computing platform) enabling organisations to analyse data from multiple sources, act on it through created applications and automate business processes.he Power Platform contains 3 key aspects (Power Apps, Power BI,Power Virtual Agents, and Power Automate) and integrates with 2 main ecosystems (Office 365 and Dynamics 365).

PL-900: Microsoft Power Platform Fundamentals

Last year November the new PL-900: Microsoft Power Platform Fundamentals was released in Beta mode and it's recently went into generally available.

After reading the "Skills Measured" section, I realized that a lot of what I have implemented in the past as a developer and i had some experience with PowerBI as well.

Based on the content , i was confident enough to take the exam but I wanted to make sure I was completely prepared for the exam on the topics which i am not familiar with, so did some learning on Dynamics 365 on Microsoft Learn and the Common Data Service (CDS) on Microsoft Learn as well.

Exam Materials and Tips:

You need to only spent 3-4 hours reviewing the Learning Path of Power Platform Fundamentals if you are already familiar with the topics. It's a pretty straight forward exam for which if you read the course on Microsoft Learn, you should be good to go. If you are aware of all the components of the Power Platform, you probably can give the exam as is.

Link to Exam: Here
Released: 4th November 2019 (GA 18/02/2020)
MS Learn: Modules available

I would request anyone preparing for PL-900 to have a good grasp of the following subjects:

  • Common Data Service
  • Difference between Power BI Desktop and Power BI Service
  • Power Apps Portals
  • AI Builder Models
  • Difference between Business Rules and Business Process Flows
  • How Power Platform works with Dynamics 365

It is not a hard exam if you are from the developer background, however get well prepared for this one! As always get hands on. Let’s be citizen developers together. Cheers!